1. Install Studio
- Download the Windows x64 setup executable and run it.
- This build is unsigned. Check that you obtained it from Rekall before deciding whether to proceed with a Windows publisher warning.
- Open Rekall Photo Studio and start the 14-day full-feature trial. Licence controls are also available under the top-right menu, License and billing....
- Before upgrading an existing catalogue, use Back up catalogue in that menu. Keep a separate backup of your original photographs.
The setup includes its .NET runtime. Setup-installed versions 0.7.2 and later check for updates at launch, download in the background and apply when Studio exits. No forced restart is required. Version 0.7.1 and earlier must be upgraded manually once. Paid checkout is not yet open. Monthly, yearly and lifetime options will share the same Studio features; AI provider access and Rekall Fusion are separate.
2. Add photographs
- Click Add folder and select a folder containing your photographs.
- Wait for import to finish. Use the sidebar to switch between all photographs, folders, picks and collections.
- Mark useful frames as picks, set ratings, and add manual keywords or notes in the inspector.
- Select several frames and choose Review selection to compare up to four photographs, or Culling... to inspect similar candidates.
Studio keeps references to source files rather than moving your shoot into a proprietary image container. Keep those files accessible. Collections organise photographs without making duplicate source files.
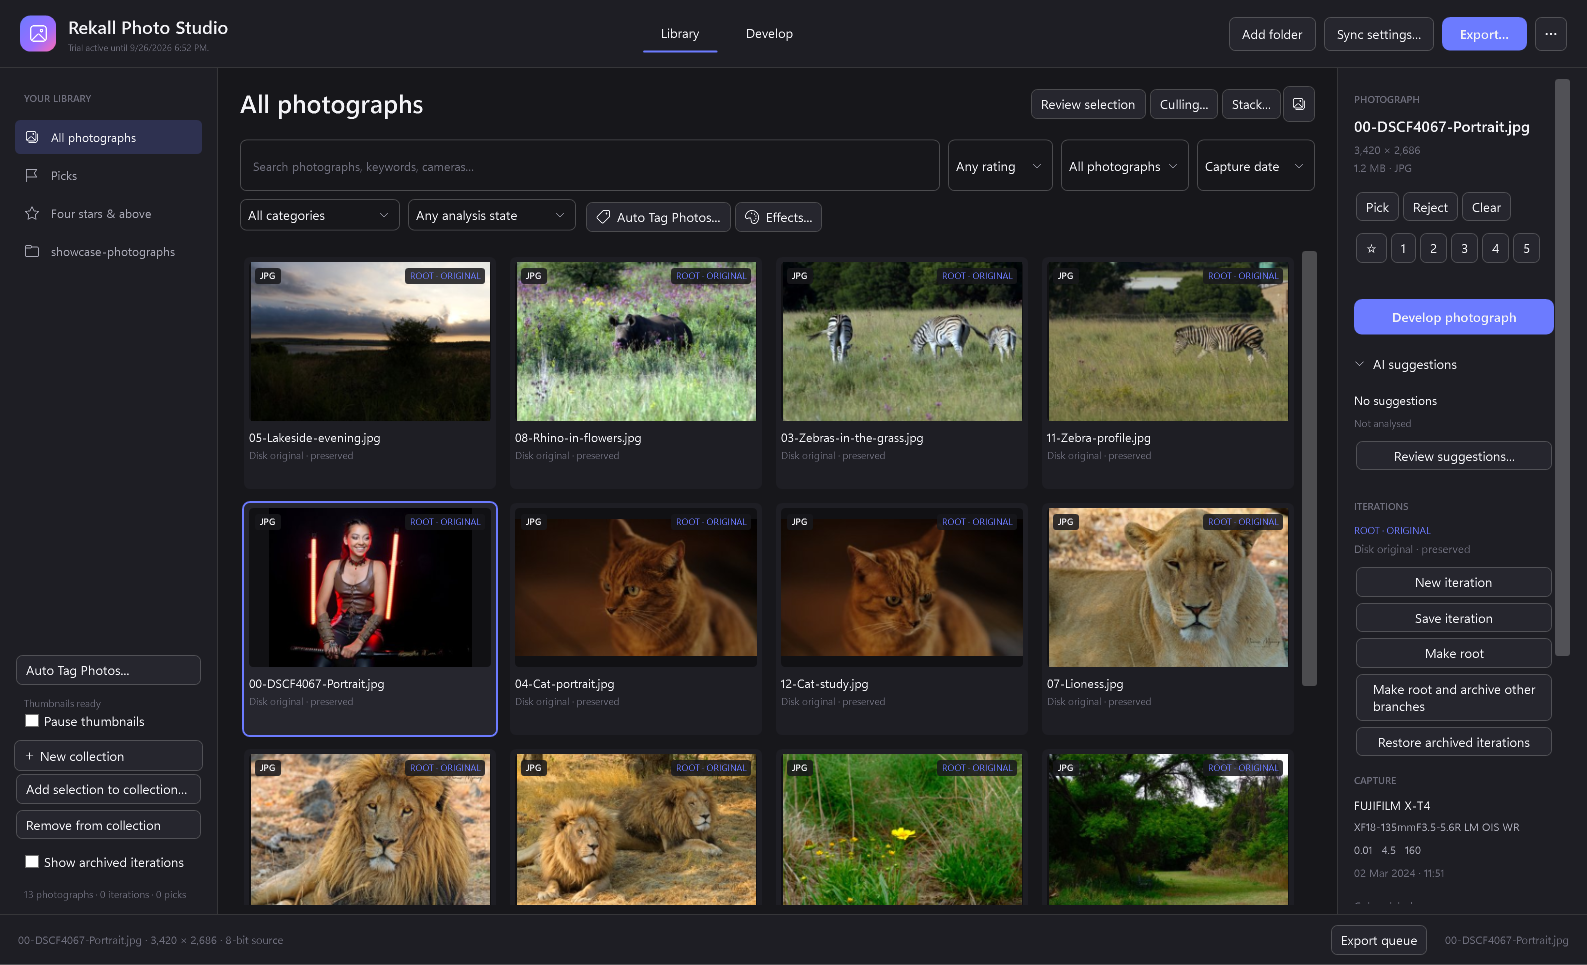
3. Background thumbnails
Thumbnail generation starts automatically while the main window is open. You do not need to scroll through every photograph.
- Whole catalogue: includes photographs outside the current folder, filter and scroll position.
- Foreground priority: visible photographs take priority over queued background renders. Work waits during imports, exports, tagging, synchronisation and active adjustment changes.
- Disk cache: existing thumbnails are reused after restarting Studio. Edits and newly imported photographs enqueue fresh work.
- Pause: check Pause thumbnails in the library sidebar. Uncheck it to resume. A native decode already underway may finish first.
- Failures: missing or unreadable files do not block the remaining queue. Reopen Studio or update the source location to attempt them again.
Only one background photograph is processed at a time. Studio does not retain a decoded thumbnail on every off-screen photo item. RAW decoding can still use substantial memory before a small preview is made.
This is local thumbnail generation, not AI tagging. It does not upload photographs.
4. Auto Tag Photos
Open Library, then click Auto Tag Photos... in the left sidebar or the toolbar above the grid.
Choose a connection
- Local · Ollama: run Ollama with a locally installed vision model, refresh the model list, select the model and save the connection. Studio does not install models automatically. The endpoint must be local, such as
http://127.0.0.1:11434. - Cloud · OpenAI API: enter a compatible vision model and your own API key in the masked field. API usage is separately billed. Never put a secret key in photo keywords or notes.
- Cloud · ChatGPT sign-in: install a compatible Codex CLI separately, or select its executable in Studio. Choose Sign in with ChatGPT, finish browser sign-in and select an available vision model. This route does not require an OpenAI API key, but uses cloud inference and your account's access and usage limits.
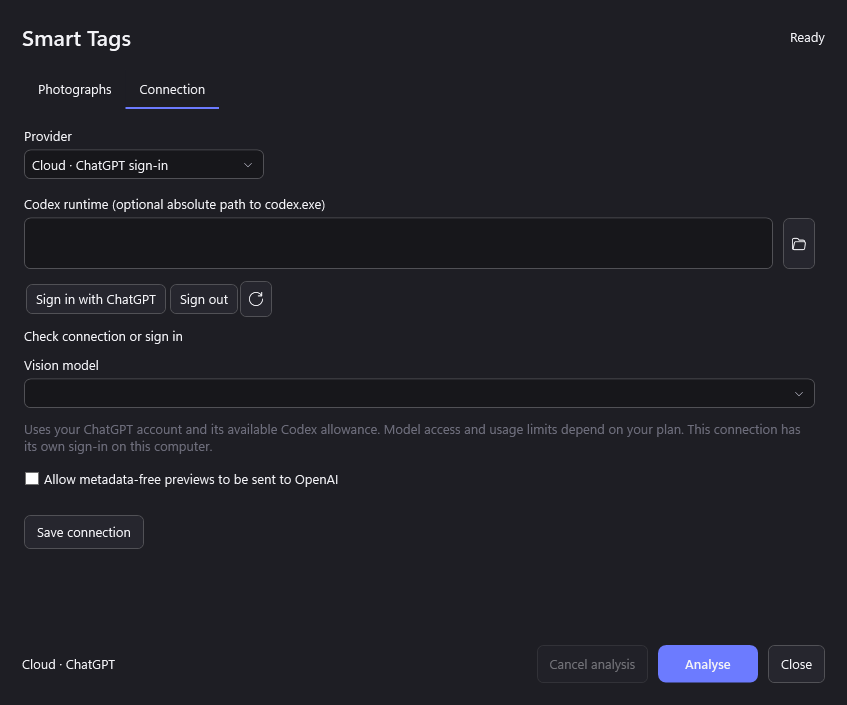
ChatGPT sign-in is an early integration. Runtime compatibility and isolated-connection checks have been tested, but live account sign-in and cloud inference have not yet completed release verification. Codex is not bundled with Studio.
Run and review
- Switch to Photographs.
- Choose Selected photographs or Not yet analysed. The latter uses imported photographs in the current filtered view. Clear restrictive folder, category and search filters to include more of the catalogue.
- Set Maximum photographs. Start with a small sample and review the results before a large run.
- Click Analyse. Cloud providers require preview-upload consent and batch confirmation. A failed local run never automatically switches to a cloud provider.
- Open AI suggestions > Review suggestions... in the inspector to correct categories, tags and captions. Saved corrections are preserved during ordinary reanalysis.
Cloud analysis receives a metadata-free JPEG preview, with a maximum long edge of 1,024 pixels, rather than the original file. Provider retention policies still apply. Results are stored in the local catalogue; source files and manual keywords remain separate. Models can produce incorrect descriptions.
Completed results are saved as the run progresses. Use Retry failed deliberately for failed jobs. Cancelling stops new work, but cannot retract a preview already submitted or its provider usage.
5. Search and filter
The library search box checks filenames, folders, camera and lens details, manual keywords, notes, categories, tags and captions. Each space-separated term must match somewhere in the photograph's searchable information.
- Exact and partial text matches are checked first.
- Descriptive words can match small spelling errors, including swapped neighbouring letters. For example,
portaritcan matchportrait. - A small curated synonym set links words such as
woodsandforest, orseasideandcoast. - Filename and camera identifiers retain literal matching rather than broad fuzzy expansion.
- Category, analysis-state, rating and flag filters combine with the search.
This is typo-tolerant text search, not an embedding-based visual search engine. It does not understand every synonym or infer objects that are absent from the stored metadata.
6. Edit and save iterations
- Select a photograph and open Develop.
- Adjust light, white balance, colour, curves, detail and noise controls. Use local masks for selective changes.
- Enable Photo tools for crop, straighten, retouch and manual optics. For Clone or Heal, choose a source with Alt-click before painting.
- Use New iteration and Save iteration to keep useful versions. Editing a protected iteration creates a child rather than replacing the protected version.
- To reuse adjustments across frames, select a source and targets, click Sync settings... and choose the adjustment groups to transfer.
Use native review and 100% detail inspection to judge fine texture. Local model-based selection or removal needs its compatible model files. Manual lens corrections are not an automatic lens-profile database.
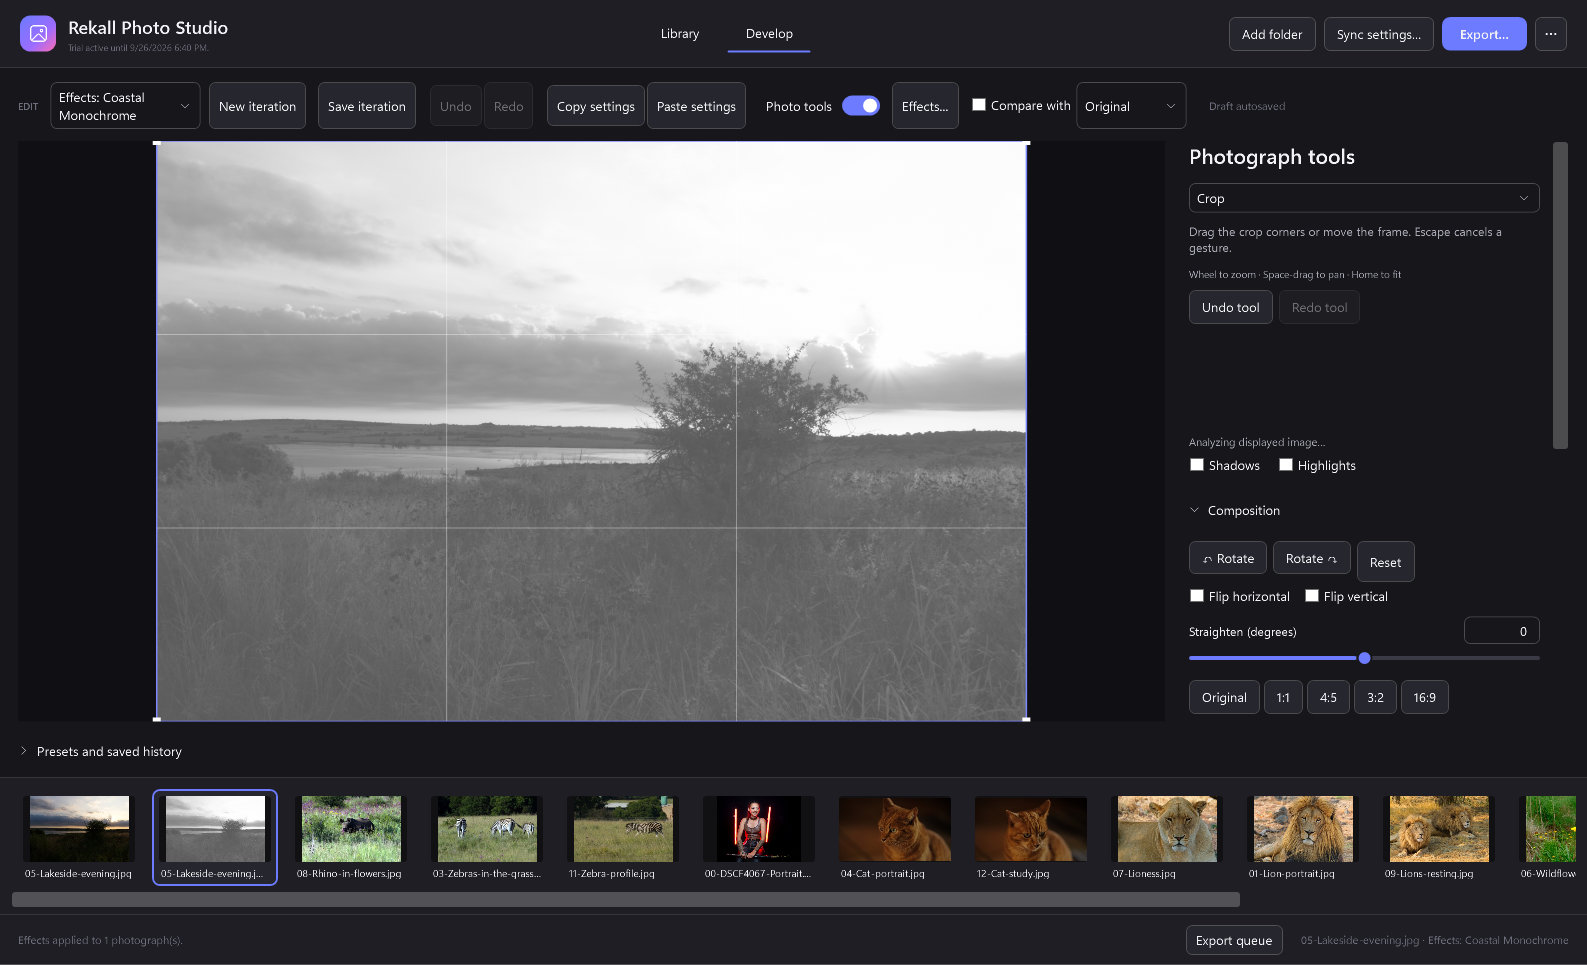
Back up both the catalogue and source photographs. Local model weights and proof-profile files are separate from a SQLite catalogue backup.
7. Coastal Monochrome presets
- Select a photograph and open Effects... from Library or Develop.
- Choose Coastal Monochrome. Tune Strength and Film grain; use Before to compare against the image before the proposed change.
- Uncheck Enabled to bypass the effect completely. Strength zero still produces monochrome.
- Use the save icon to create a named processing preset. Presets retain effect settings, order, enabled states and the JPEG quality preference.
- Click Apply effects. To apply across the current selection, use Replace effects on selected photographs and confirm.
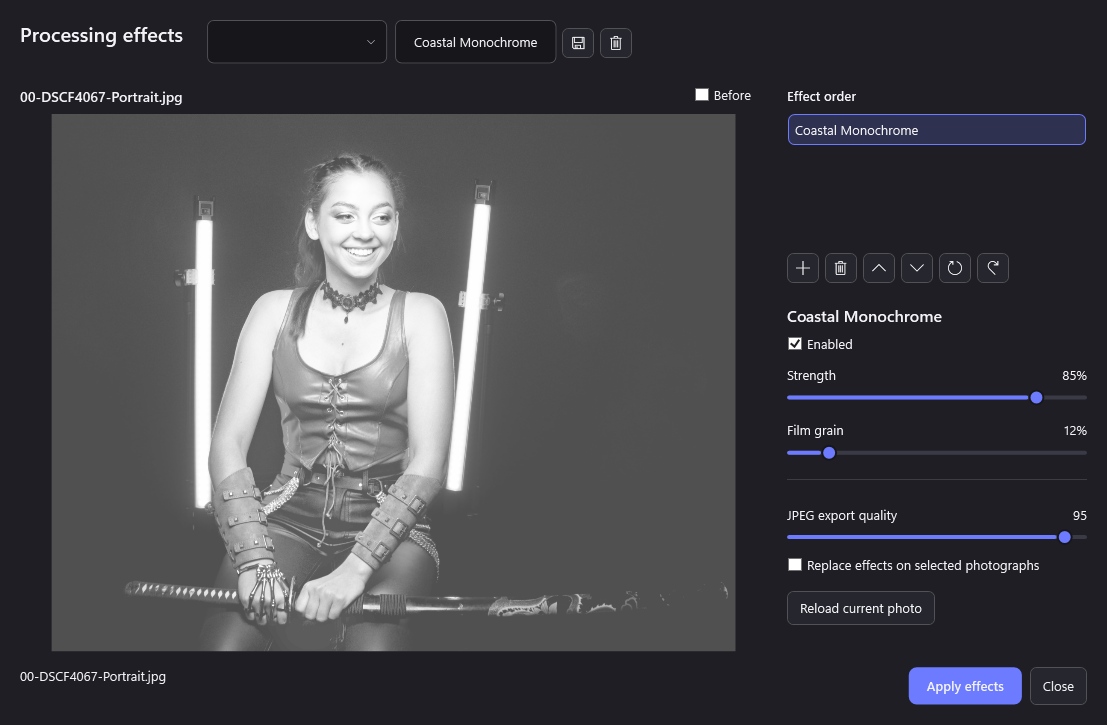
Applying a preset replaces the processing effects and JPEG preference, not the photograph's RAW settings, adjustments, retouch or crop. JPEG quality affects export, not the visual preview. The export dialog controls final batch settings.
The effects window remains attached to its named photograph if you navigate elsewhere; Reload current photo explicitly changes the target. Use the arrow buttons inside Effects to undo or redo photo operations. Closing without applying leaves the proposed effects unsaved.
Coastal Monochrome is the first built-in processing effect. The operation list supports future native effects; it is not a third-party binary plugin loader.
8. Stack in Rekall Fusion
- In Library, open Stack....
- Choose Find likely focus stacks... to review candidate groups, or select known bracket frames yourself.
- Choose Stack selected in Rekall Fusion to hand off selected originals.
- If Fusion is installed elsewhere, use Locate Rekall Fusion.... If it is not installed, follow the offered store-page route.
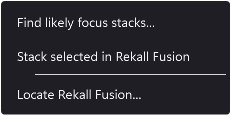
Grouping is a suggestion, not a guarantee of focus coverage or successful alignment. Review the frames before stacking. Studio hands off originals, not a promise to bake its current edits into a stack. Fusion has its own guide, application and licence.
9. Export photographs
- Select the photographs or iterations you want to deliver and click Export....
- Choose the output folder, format, naming and resizing settings. Check JPEG quality if using a processing preset.
- Start the export and open Export queue to inspect progress and failures.
- Use queue actions to cancel, retry failed work or resume unfinished jobs as appropriate.
Exports render saved development, processing effects and photo operations into separate output files. Collision-safe naming and source checks help protect originals. A batch cancelled partway through can already have completed outputs; cancellation is not a rollback.
Requirements and current limits
- Platform: Windows x64. The installer includes the required runtime. There is no macOS or Linux build in this release.
- Storage: allow space for your catalogue, disposable thumbnail caches and exports. Original photographs must remain available for rendering.
- RAW support: compatibility depends on the camera format and decoder. Test a representative file from your camera before importing a full shoot.
- AI: optional local providers need their runtime, model files and suitable hardware. Cloud providers need connectivity, account access and explicit consent.
- Colour: the working/export space is sRGB. RGB ICC soft proof is a display simulation; it is not a CMYK print-production workflow.
- Versioning: newer catalogue and effect formats may not be readable in older Studio versions. Back up before upgrading.
- Licensing: one functional Studio edition, with monthly, yearly and lifetime billing options planned. Paid checkout is not yet open.
Troubleshooting
I cannot find automatic tagging.
Switch to Library and choose Auto Tag Photos in the sidebar or above the grid. If your app still shows only Smart Tags, check that you installed 0.7.1. Connection configures the provider; Photographs chooses the batch.
Thumbnails are waiting.
In 0.7.3, unedited RAW thumbnails use embedded camera previews where available; their colour and detail can differ from the full RAW development. JPEGs decode at thumbnail size with colour management. Unsupported files and edited previews retain the full renderer. Uncheck Pause thumbnails. Let active imports, exports or tagging finish, and leave Studio open. An in-progress RAW decode cannot always stop immediately. Offline or unreadable sources are skipped so the remaining queue can continue.
Tagging finds fewer photos than expected.
Not yet analysed follows the current filtered view. Clear search and category filters and select All photographs. Also check Maximum photographs, which defaults to 100 per run.
My local model list is empty.
Check that Ollama is running locally and has a vision model installed. Refresh the list in Connection. Studio does not install a model or silently fall back to a cloud provider.
ChatGPT sign-in does not connect.
Check the selected Codex executable and runtime compatibility, then refresh the connection. This integration was checked against CLI 0.149.1, but live sign-in remains a release-verification step. Keep using a working local provider while diagnosing the connection.
The Stack menu is white on white.
Install Studio 0.7.1, which gives the popup an explicit dark background and readable text.
A photograph is offline or an export fails.
Restore the drive or use Studio's relink workflow. Check available disk space and the export error before retrying. Do not delete original files to clear thumbnail-cache problems.